Hello all, today we are going to talk about a very interesting topic regarding WordPress development. We are all already aware of what WordPress is and what it’s functioning so can we create an e-commerce site on WordPress, for getting customers and making a profit the answer is yes. We just need to use WordPress’s available free plugin for e-commerce which is WooCommerce.
What is woocommerce – As I describe above woocommerce is a plugin that is used for creating an online shop in the form of a website by using WordPress.
Installation- For the process of installation of woocommerce is the same as installing any kind of WordPress plugin. After installation when you activate the plugin woocommerce shows an interface for setting up your shop. There are 5 basic steps for setting up woocommerce in WordPress. You are redirected to the first step just after the activate your woocommerce plugin in your admin panel.
1. Store Details– You first see this page where you have to put your store information.
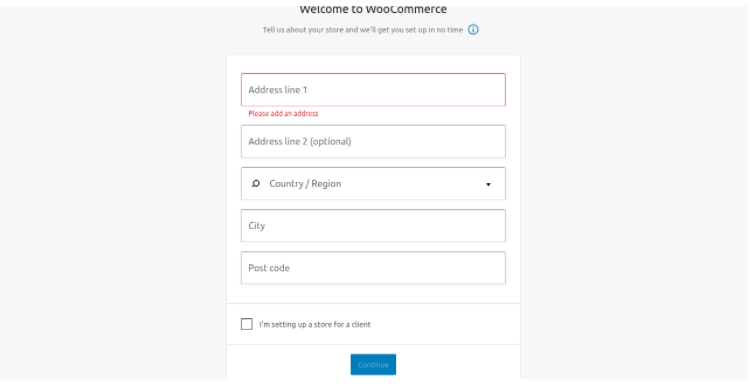
You can also skip this step if you do not want to set it at present. But if you are continuing with the setup you have to put your store address with your city, country, and Pincode where your store is located.
2. Payment- After you set up your store location details you are going to another tab which is very important for any kind of e-commerce website that is payment on the initial level. There are two most popular payment options you can see on your screen: the first one is stripe and another one is PayPal. You can also collect offline payments if you want this option is also available in woocommerce like cash on delivery. You can add more payment options as per your requirement by the add-on provided by woocommerce.

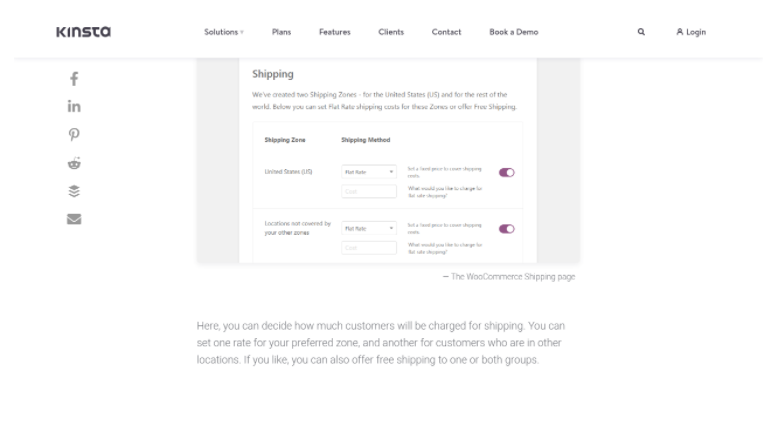
3. Shipping– Once you are done with your payment options setup the woocommerce comes to you on the shipping tab as you are aware it’s online shopping so shipping plays an important role in this so on this tab you can decide what should be your shipping zone and whether you want to provide free shipping or add some delivery charges. The shipping tab will look like as shown below:
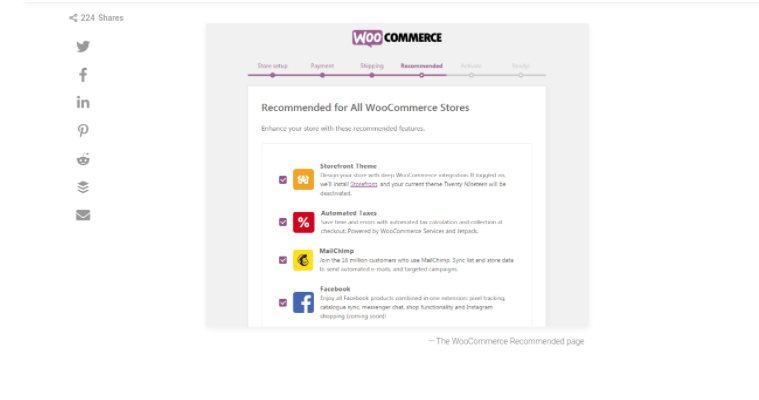
4. Recommended- After the shipping details woocommerce set up take you to recommended tab in this tab you will see themes and plugins options which you should use for making your website better. On this tab you will see that storefront theme which was originally created by woocommerce, it’s not compulsory to use this theme but you can use this for setting up your shop or you can choose any other theme which you want or can create a custom theme as well.
5. Activate– After the recommended tab you will see another tab named “Activate”. This woocommerce offers you to connect your store to jetpack to enable extra features. This also you can do afterward.
6. Ready– Now you are on the final tab here you can set up your email where you want to get an information update regarding your woocommerce website.
Then finally you are ready to create your first product, put their specifications on the product section of the admin panel and you will see that product on the shop page which is default generated by woocommerce.
Assign and Setup Pages- You have to go to settings of woocommerce where you can assign pages for cart, shop, checkout, etc. Although when you installed woocommerce it already created some pages in your WordPress admin panel by default. When you edit those pages you can easily see that they have some shortcode already in that regarding their respective functionality.
When you go to woocommerce->settings->products, in the products tab you can assign a page for your shop, where customers can see all products which you are providing in your shop. Basically, this page is your e-shop.
Creating Product – For adding products you have to go to your wp-admin->products->Add New. Here you have to put the following details of your product:
- Product Name
- Product Description
- Product Price (Regular and if there is any kind of discount then sale price.)
- You can set if your product is in stock or not by Products-> Add New -> Product Data -> Inventory
- Shipping options tab
- You can attract customers to buy other products by using the Linked Products option.
- This is the most interesting tab where you can add other specifications of your product as an attribute. You can add new attributes here.
This section looks like this in the admin panel:
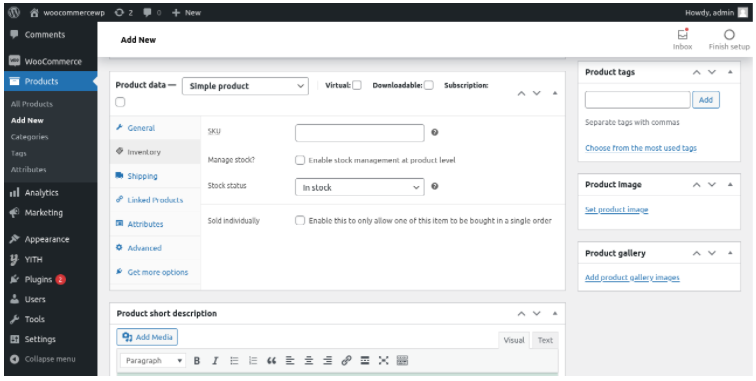
In the above diagram, you can see all the sections which I described above.
Purchasing Process- The woocommerce site’s purchasing process is the same as any other e-commerce website, you have to go to the shop page, then add your product to your cart, then go to the cart page and then proceed to checkout, as simple as that. The simplicity of this process makes woocommerce very popular.
Here is what our checkout page look like:
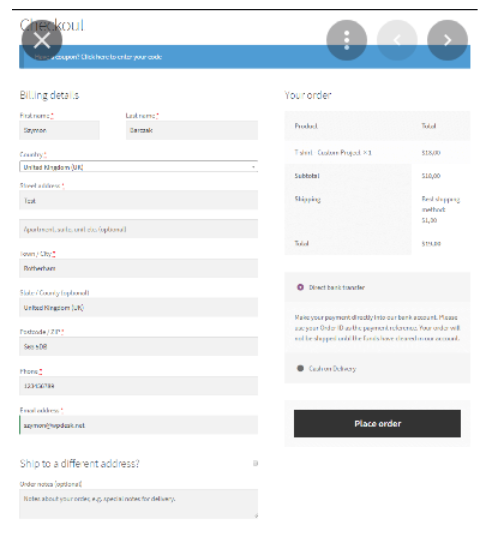
You have to put your billing details as well as shipping details in case if needed them.