Introduction
A reusable Angular service is designed to encapsulate business logic and data with different components of Angular.
Service is a broad category encompassing any value, function, or feature that an application needs
Why Services Are Needed
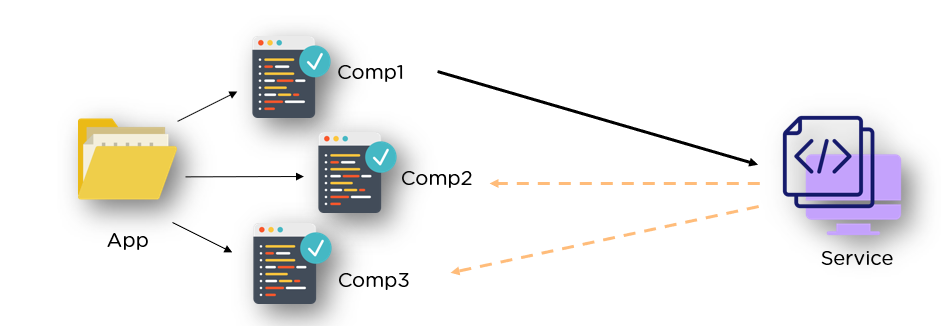
services in Angular let you define code or functionalities that are then accessible and reusable in many other components in your Angular project. Services help you with the abstraction of logic and data that is hosted independently but can be shared across other components.
The service class has a single, well-defined function, helping you make your application structure very modular. It is different from other classes in Angular because of the injection process. Dependency injection is the concept that makes it possible for you to receive dependencies from one class to another.
What is Angular Service
Angular services are objects that get instantiated just once during the lifetime of an application. They contain methods that maintain data throughout the life of an application, i.e., data is available all the time.
The main objective of a service is to organize and share business logic, models, or data and functions with different components of an Angular application. They are usually implemented through dependency injection
Creating The Services
To create a service in Angular, you need to run the generate service command:
ng generate service data
Understanding Angular Service with an example:
First we will understand how to create angular service and then we will discuss how to use angular service within a component.
Step1: Creating Angular Service:
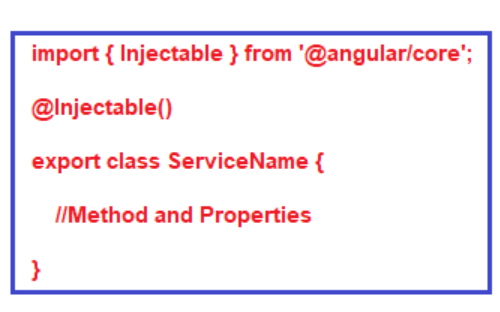
The angular service is composed of three things. You need to create an export class and you need to decorate that class with @Injectable decorator and you need to import the Injectable decorator from the angular core library.
Angular service for fetching the student details and this student details is going to be used by many components.
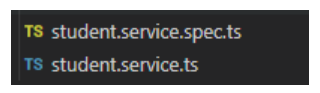
create an angular service for fetching the student details and this student details is going to be used by many components. So, open terminal and type ng generate service Student

It will create two files within the app folder:
Open student.service.ts file and then copy and paste the following code in it. At the moment we have hard-coded the student data, later in this article series we will discuss how to get this data from restful APIs. Here, you need to focus on two things. The @Injectable decorator and the getStudents method which returns the student data. As with all other angular decorators, we preceded the name with an @ symbol, and we do not add a semicolon (;) at the end.
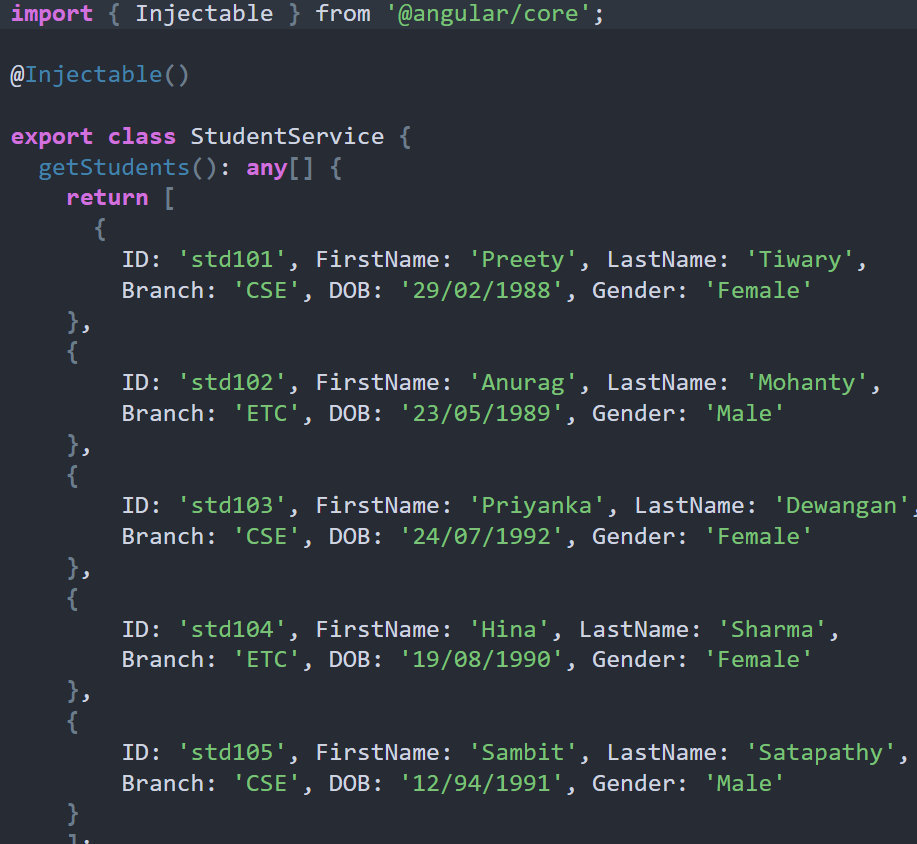
Note: The @Injectable() decorator in angular is used to inject other dependencies into the service. At the moment our service does not have any other dependencies, so, yo can remove the @Injectable() decorator and the service should works. However, the Angular Team recommends to always use @Injectable() decorator to ensures consistency
Step2: Using the Service in Angular :
Once you created the service, the next and the important step is to inject and use the service within the components. It is a three step process. Import the service, register the service and use the service.
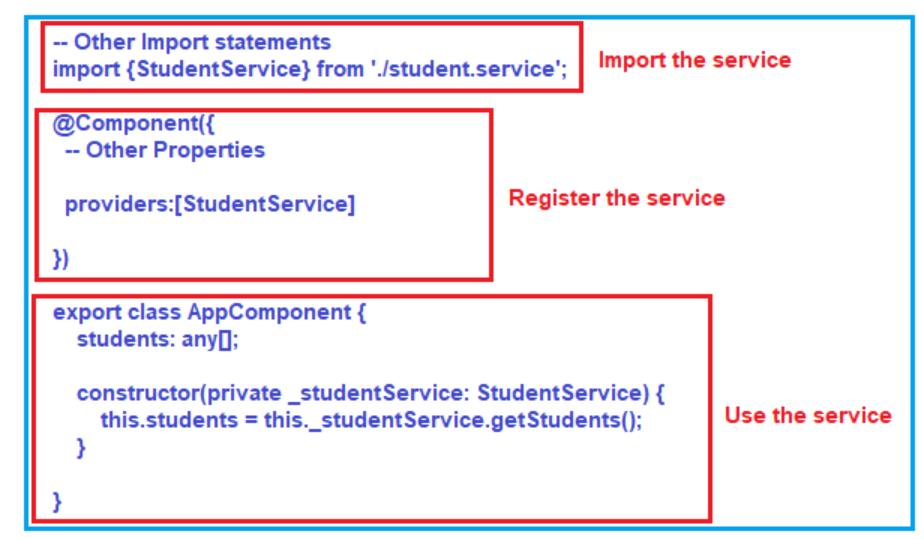
First we import the service. Then we need to register the Service in the component by declaring it in the providers array. Then we need to Inject StudentService using the constructor. The private variable _studentService which points to StudentService singleton instance is then available throughout the class.
we want to use the Student Service within our AppComponent class:
Modifying app.component.ts file:
Open app.component.ts
we declare one variable called students and then initialize this variable using the student service.
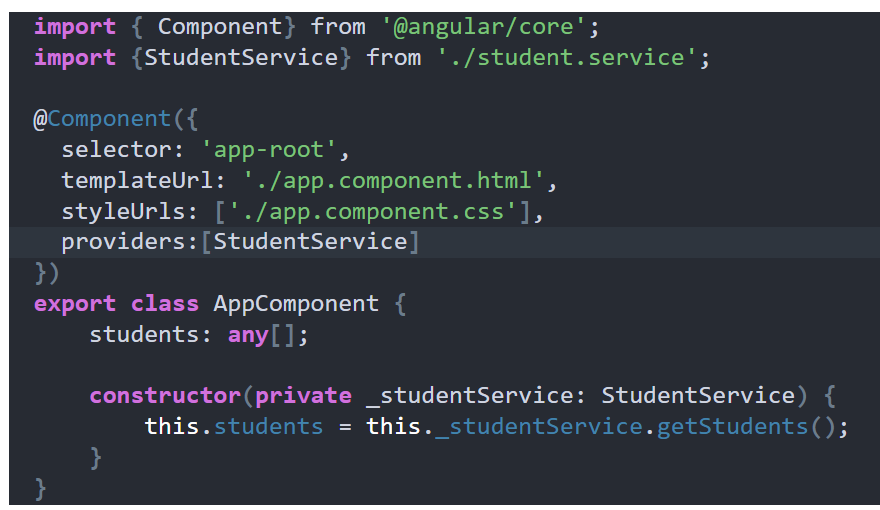
we declare one variable called students and then initialize this variable using the student service.
Modifying app.component.html file:
open app.component.html
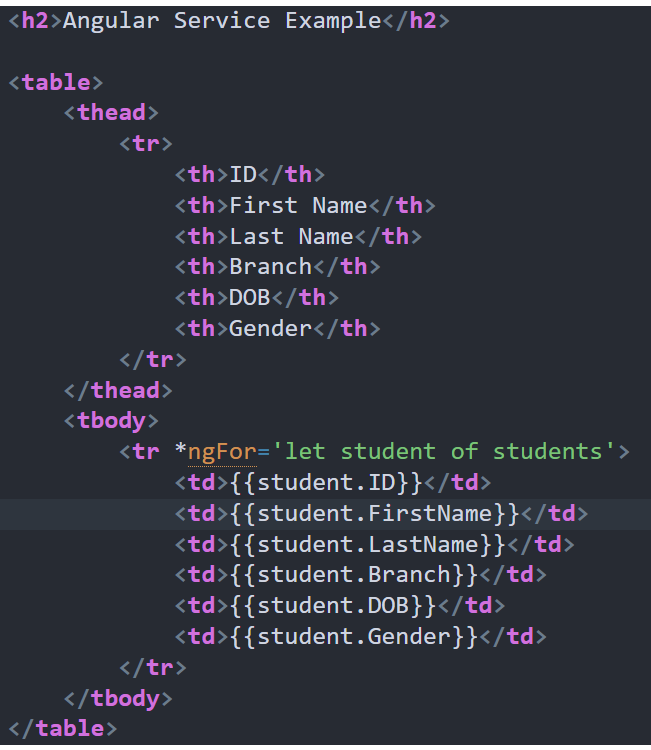
now browse the application and you should see the student data as expected in the browser as shown in the below image.

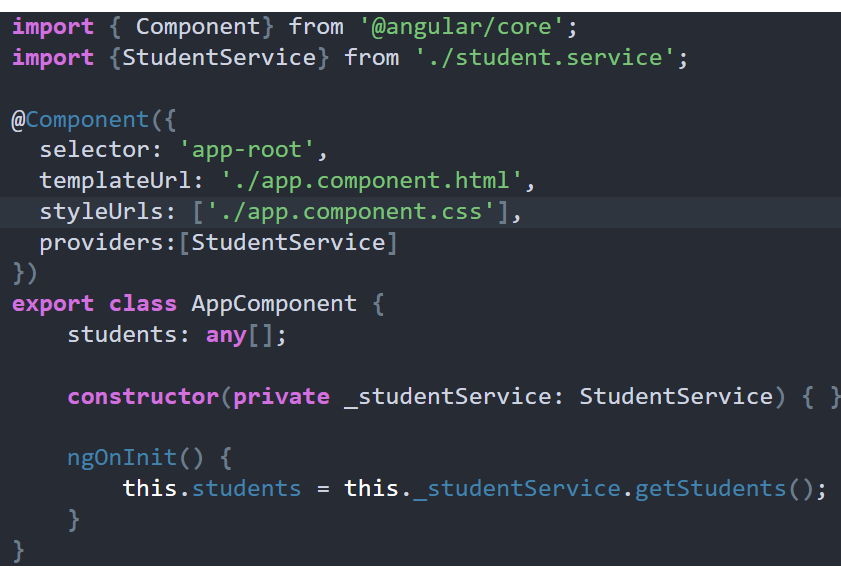
Using ngOnInit() life cycle hook to call the getStudents() service method:
How to use ngOnInit to call the service method and then we will see the difference between calling the service method from a constructor and from ngOnInit life cycle hook. So, modify the app.component.ts file as shown below to use ngOnInit life cycle hook to call the getStudents method of Student Service.
Advantages of Service:
Common Purpose: One of the most important benefits is that we can create a single service for multiple components. This is something that you will actually realize while testing Angular services. Not writing the code for every component separately means time and cost-saving.